


Ultimate Guide to Identifying Song Chords Online (Fast, Accurate, and Beginner-Friendly)
If you need a Chord progression finder from audio, this guide is for you. Today, many musicians, producers, teachers, and students face the same problem. So, they want the right chords fast, but they do not want to waste hours on unreliable tabs.
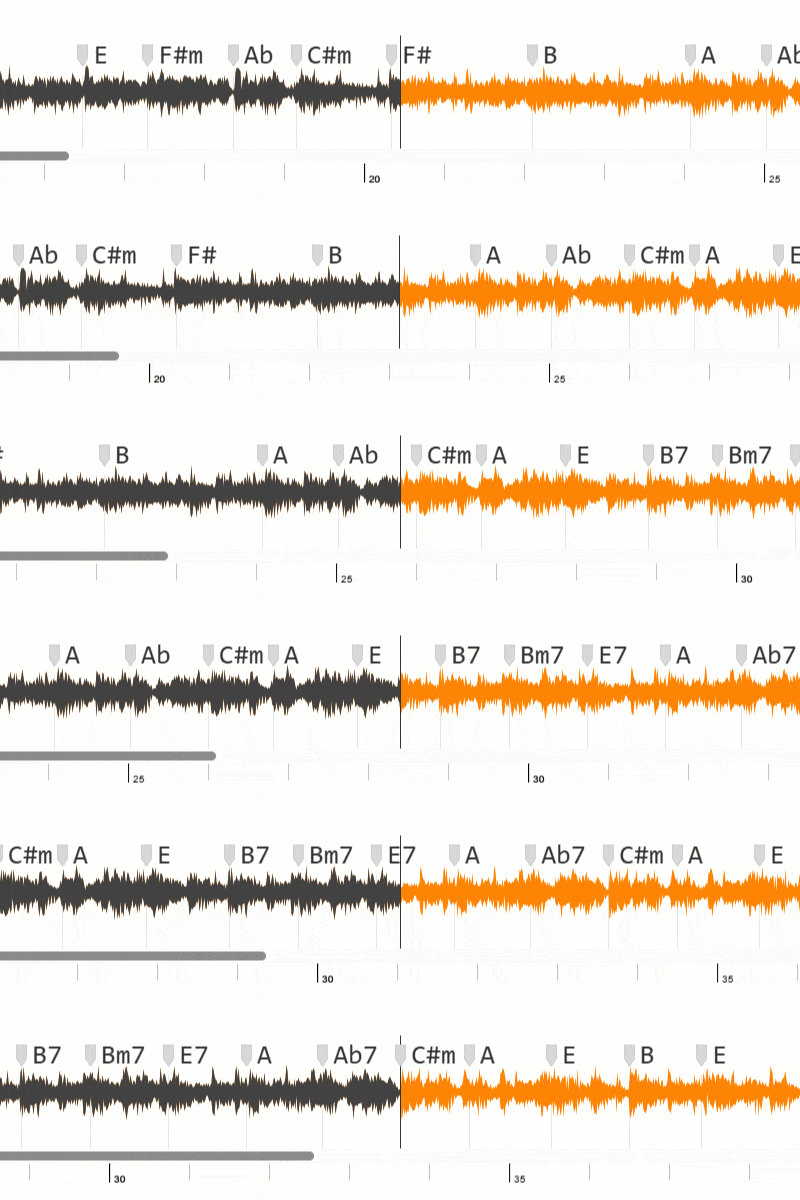
Today, chord tools make that process much easier. For example, you can upload an audio file or paste a YouTube link. Then, within seconds, you get a clean chord progression to practice. In short, a good Chord progression finder from audio removes guesswork and saves time.
In this guide, you will learn:
- first, what an online chord identifier does,
- next, how to get better chord recognition results,
- then, common mistakes to avoid,
- and finally, how to use these chords to practice faster on guitar, piano, ukulele, and more.
What Is a Chord Progression Finder from Audio?
First, an online chord identifier is a web tool that analyzes sound and estimates the harmony of a song. In simple terms, it listens to the track and shows which chords appear over time.
Also, most modern systems use machine learning. As a result, a Chord progression finder from audio can work across many genres, including pop, rock, gospel, jazz, acoustic, and electronic music.
So, depending on the platform, you can usually:
- upload local audio files (MP3, WAV, and similar formats),
- paste a YouTube URL,
- view the detected chord sequence in order,
- and use the output for practice, study, arrangement, or teaching.
Why Musicians Use a Chord Progression Finder from Audio
1) Save Time
Instead of transcribing a full song by ear, you get a fast harmonic starting point. As a bonus, you spend more time playing and less time searching.
2) Learn Songs Faster
As a result, beginners can move from “listening only” to “playing along” much sooner. Therefore, motivation stays high.
3) Improve Ear Training
First, compare your guesses with detected chords. Over time, this improves your ear and harmonic awareness.
4) Support Teaching and Content Creation
For example, teachers can prepare lessons faster. In addition, creators can build covers, tutorials, and arrangements with less friction.
5) Explore New Styles
When chord extraction becomes easy, musicians explore more songs and more styles. Consequently, practice stays fresh and motivating.
How a Chord Progression Finder from Audio Works
In general, although details vary by platform, chord recognition often follows this pipeline:
- Audio input is converted into a time-frequency representation.
- The system identifies note clusters and harmonic centers.
- A prediction model estimates likely chords over each segment.
- Post-processing smooths noisy transitions and keeps progression coherence.
As a result, you get a timeline of chords you can follow while listening. Moreover, this timeline helps you practice each section with more focus.
Step-by-Step: Better Results with a Chord Progression Finder from Audio
Step 1: Choose a Clean Audio Source for a Chord Progression Finder from Audio
First, use the best-quality source you can find. Otherwise, noise, distortion, or low bitrate may reduce accuracy.
Step 2: Upload File or Paste Video URL in a Chord Progression Finder from Audio
Next, most tools support direct upload and link-based analysis from video platforms. Additionally, clear audio usually improves final chord quality.
Step 3: Wait for Processing in Your Chord Progression Finder from Audio
Then, processing may take a few seconds. However, longer songs can take around half a minute.
Step 4: Review Chords in Context with a Chord Progression Finder from Audio
After that, play the progression with the original track. Next, check intro, verse, chorus, and bridge sections.
Step 5: Adjust for Musical Interpretation After Chord Progression Finder from Audio Results
Finally, no automated system is perfect. So, make small corrections using your ear and your instrument voicings.
Common Chord Progression Finder from Audio Mistakes
Mistake 1: Trusting the Output Blindly
First, always validate key moments by ear, especially in complex genres or live recordings. Otherwise, one wrong section can affect the full progression.
Mistake 2: Ignoring Song Key
Next, if the progression feels inconsistent, first confirm the song key and possible transposition. Then, test the corrected chords on your instrument.
Mistake 3: Using Very Noisy Audio
Also, crowd noise, heavy reverb, or clipped audio can confuse harmonic detection. Therefore, prefer studio versions when possible.
Mistake 4: Expecting Exact Studio Voicings
Moreover, chord identifiers usually provide harmonic labels. However, they do not always match the exact studio voicing.
Mistake 5: Not Practicing With the Progression
Lastly, recognition helps most when you apply the result on your instrument right away. In other words, quick practice turns data into skill.
Who Benefits Most From a Chord Progression Finder from Audio?
- First, beginner musicians who need quick, practical chord references.
- Next, intermediate players improving harmony and improvisation.
- Also, music teachers creating lesson material efficiently.
- In addition, worship teams and bands that need fast preparation.
- Likewise, producers and arrangers building covers, mashups, and reharmonizations.
- Finally, content creators publishing tutorials and play-alongs.
Chord Progression Finder from Audio Practice Routine
To start, try this 20-minute routine:
- Minutes 1-5: First, listen to the song once and note the form (intro, verse, chorus, bridge).
- Minutes 6-10: Next, follow the detected chord progression and strum or comp slowly.
- Minutes 11-15: Then, loop one section and refine transitions between difficult chords.
- Minutes 16-20: Finally, play along with the full section at normal tempo.
Finally, repeat this routine daily with a different song to build speed and confidence. As a result, your chord changes become smoother each week.
How to Use Chord Progression Finder from Audio Results on Different Instruments
Guitar: First, start with open-position shapes, then move to barre and extended voicings.
Piano/Keyboard: Next, play root-position triads first, then add inversions for smoother voice leading.
Ukulele: Meanwhile, use compact voicings and focus on rhythm consistency.
Bass: Finally, extract root movement first, then add passing tones based on chord quality.
Likewise, each instrument benefits from the same method: detect, test, adjust, and repeat. Because of that, a Chord progression finder from audio works for many practice styles.
Can You Rely on a Chord Progression Finder from Audio Alone?
Of course, these tools are excellent accelerators. Still, the best results come from combining:
- first, automated detection,
- second, basic music theory,
- and third, active listening.
So, think of chord software as a smart assistant, not a final judge. On one hand, it speeds up the process and reduces friction. On the other hand, your musicianship confirms final details.
Final Thoughts
Overall, if your goal is to learn songs faster and practice better, this workflow is a great fit. In fact, a reliable Chord progression finder from audio can save time every week.
Then, use it to start your harmonic analysis, and then verify key moments by ear. In the long run, this method improves timing, harmony, and confidence.
Most importantly, keep sessions short and consistent. As a result, that habit creates better results than occasional long practice days. In the end, consistent reps matter more than perfect tools.